Planning a backcountry ski tour
This Basecamp article is a guide on how to plan a ski tour, to help you in the decision-making process and assessing of a chosen ski tour, and to minimize risk. In addition to the planning stage back at home and assessing the situation in person and throughout each stage of the tour, we will also look at the factors of ‘conditions’, ‘terrain’ and ‘people’, and the influence they can have.
In order to consider and analyze all influences and factors and draw the right conclusions, you need a sound knowledge of weather and avalanche conditions, terrain characteristics, routes, group dynamics and the use of safety equipment. A structured approach and clear rules avoid mistakes, minimize risk and increase safety. For this reason, a standardized approach to avalanche risk assessment has been established.
Learn the most important Facts About tour Planning from our expert Ben Reuter
Lorem ipsum
At vero eos et accusam et justo
Tour planning and methods – the basics
From the planning stage back at home through to skiing through unracked powder, Werner Munter’s 3x3 model divides the whole tour planning process into three distinct steps (planning, localized assessment and individual slope assessment) throughout which three factors (conditions, terrain and people) must constantly be reassessed. Assessment of these follows the DCMR system, which is used in each of the three steps:
- Planning
- Assessment on-site
- Individual slope assessment
DCMR can be broken down into 4 steps:
Tour planning and methods – the basics
From the planning stage back at home through to skiing through unracked powder, Werner Munter’s 3x3 model divides the whole tour planning process into three distinct steps (planning, localized assessment and individual slope assessment) throughout which three factors (conditions, terrain and people) must constantly be reassessed. Assessment of these follows the DCMR system, which is used in each of the three steps:
- Planning
- Assessment on-site
- Individual slope assessment
DCMR can be broken down into 4 steps:
DCMR system
To estimate the potential consequences of an avalanche in the planning phase, the map is examined to check the size of the slopes you want to ski and whether there are gullies, depressions, drops or other terrain hazards that could present run-out problems or lead to deeper burial. The thickness of a possible snow slab is also a factor here, because you can assess the risk of deeper burial. This can be ascertained from the snowpack description in the avalanche bulletin. Safe assembly points should be identified, and an initial assessment should be made as to whether terrain features will make it necessary to ski the slope one by one.
This is about the options that are open to you personally, to reduce the probability of an avalanche occurring. The trajectory on the slope, for instance, is important to make sure any weak layers in the snowpack are not disturbed, triggering a slide. The best place to lay tracks can vary according to prevailing type of avalanche problem. Maintaining safe distances between skiers, skiing the slope one by one, and determining safe assembly points can also help lessen the consequences of an avalanche.
These three aspects combined – danger, consequences and measures – are what determine risk. In other words: The probability of an avalanche (D = danger), multiplied by the consequences (C), minus any possible measures (M) that can be taken, equals the risk (R) level you must establish in order to make a decision. It is important to also take into account the willingness to take risks of individuals within the group, and to talk openly about the situation, so that others can make an informed decision.

Planning
Assessment on-site

Individual slope assessment


Effective tour planning is the foundation of a successful and safe experience in the mountains. Since at this stage, we are not usually armed with observations from the actual terrain, we must refer to the data we do have in selecting our area and route. In addition to maps and guides, these are mainly the weather forecast and avalanche bulletin for a specific region.
What has the weather been like over the last few days?
What is the weather forecast for the day?
What do the temperatures tell us?
What is the avalanche danger level today?
Conditions
- Avalanche bulletin
- Weather report
- Tour portals on the Internet
- Time of day / season
- Further information

Terrain
- Plan the route on a 1:25,000 map, including alternatives
- Guide literature and ski tour map
- Look for and assess key sections
- Information from local experts

People
- Who is coming?
- Group size?
- Clarify responsibility and expectations of the participants
- Group / leader constitution
- Equipment
- Timetable
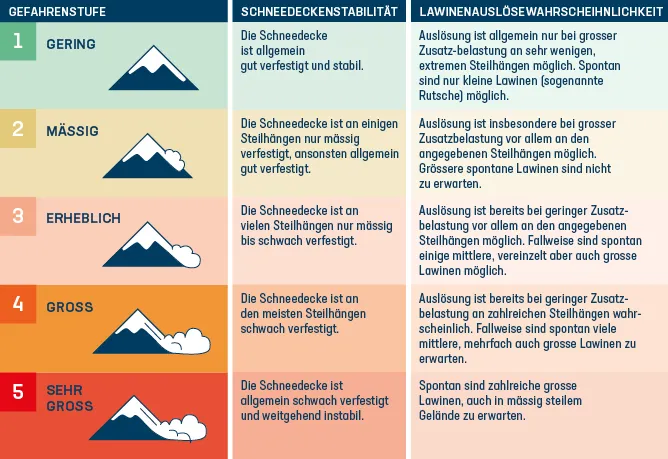
European avalanche danger scale
The reported avalanche danger level gives us an initial point of reference and a general overview of regional avalanche risk. On a scale from 1 to 5, the avalanche danger level is indicated according to the following parameters:
The probability of an avalanche,
the spatial distribution of danger areas, or
the size and frequency of expected avalanches.
Variations or combinations of these input variables determine the avalanche danger level. Avalanche risk rises from Level 1 (low) to Level 2 (moderate), 3 (considerable), 4 (high) to 5 (very high) but not in a linear fashion. Avalanche danger usually increases exponentially (i.e. level 3 is not simply one level higher than 2, but possibly twice as high).
Source:
What is the type of avalanche problem and probability of an avalanche today?
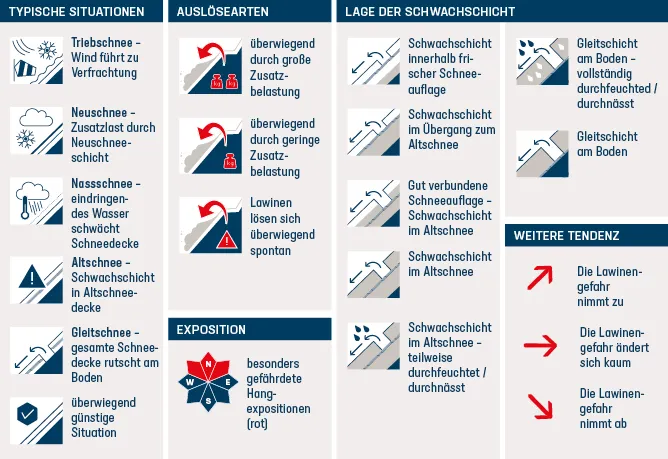
The avalanche report data will help focus on the current avalanche problems. Across Europe there are six accepted types of avalanche problem: new snow, wind slab, persistent weak layers, wet snow, gliding snow and avalanche prone situation. These can occur both individually and combined. A description of the danger is always provided alongside for clarity. This provides more detailed information on danger spots, terrain features, wind slab slopes, ridges, gullies, depressions, expected avalanche size, likelihood of release, changes in the avalanche risk within the forecast period etc.
Source: Avalanche warning service Styria - Explanation of the symbols
Where are the danger spots today?
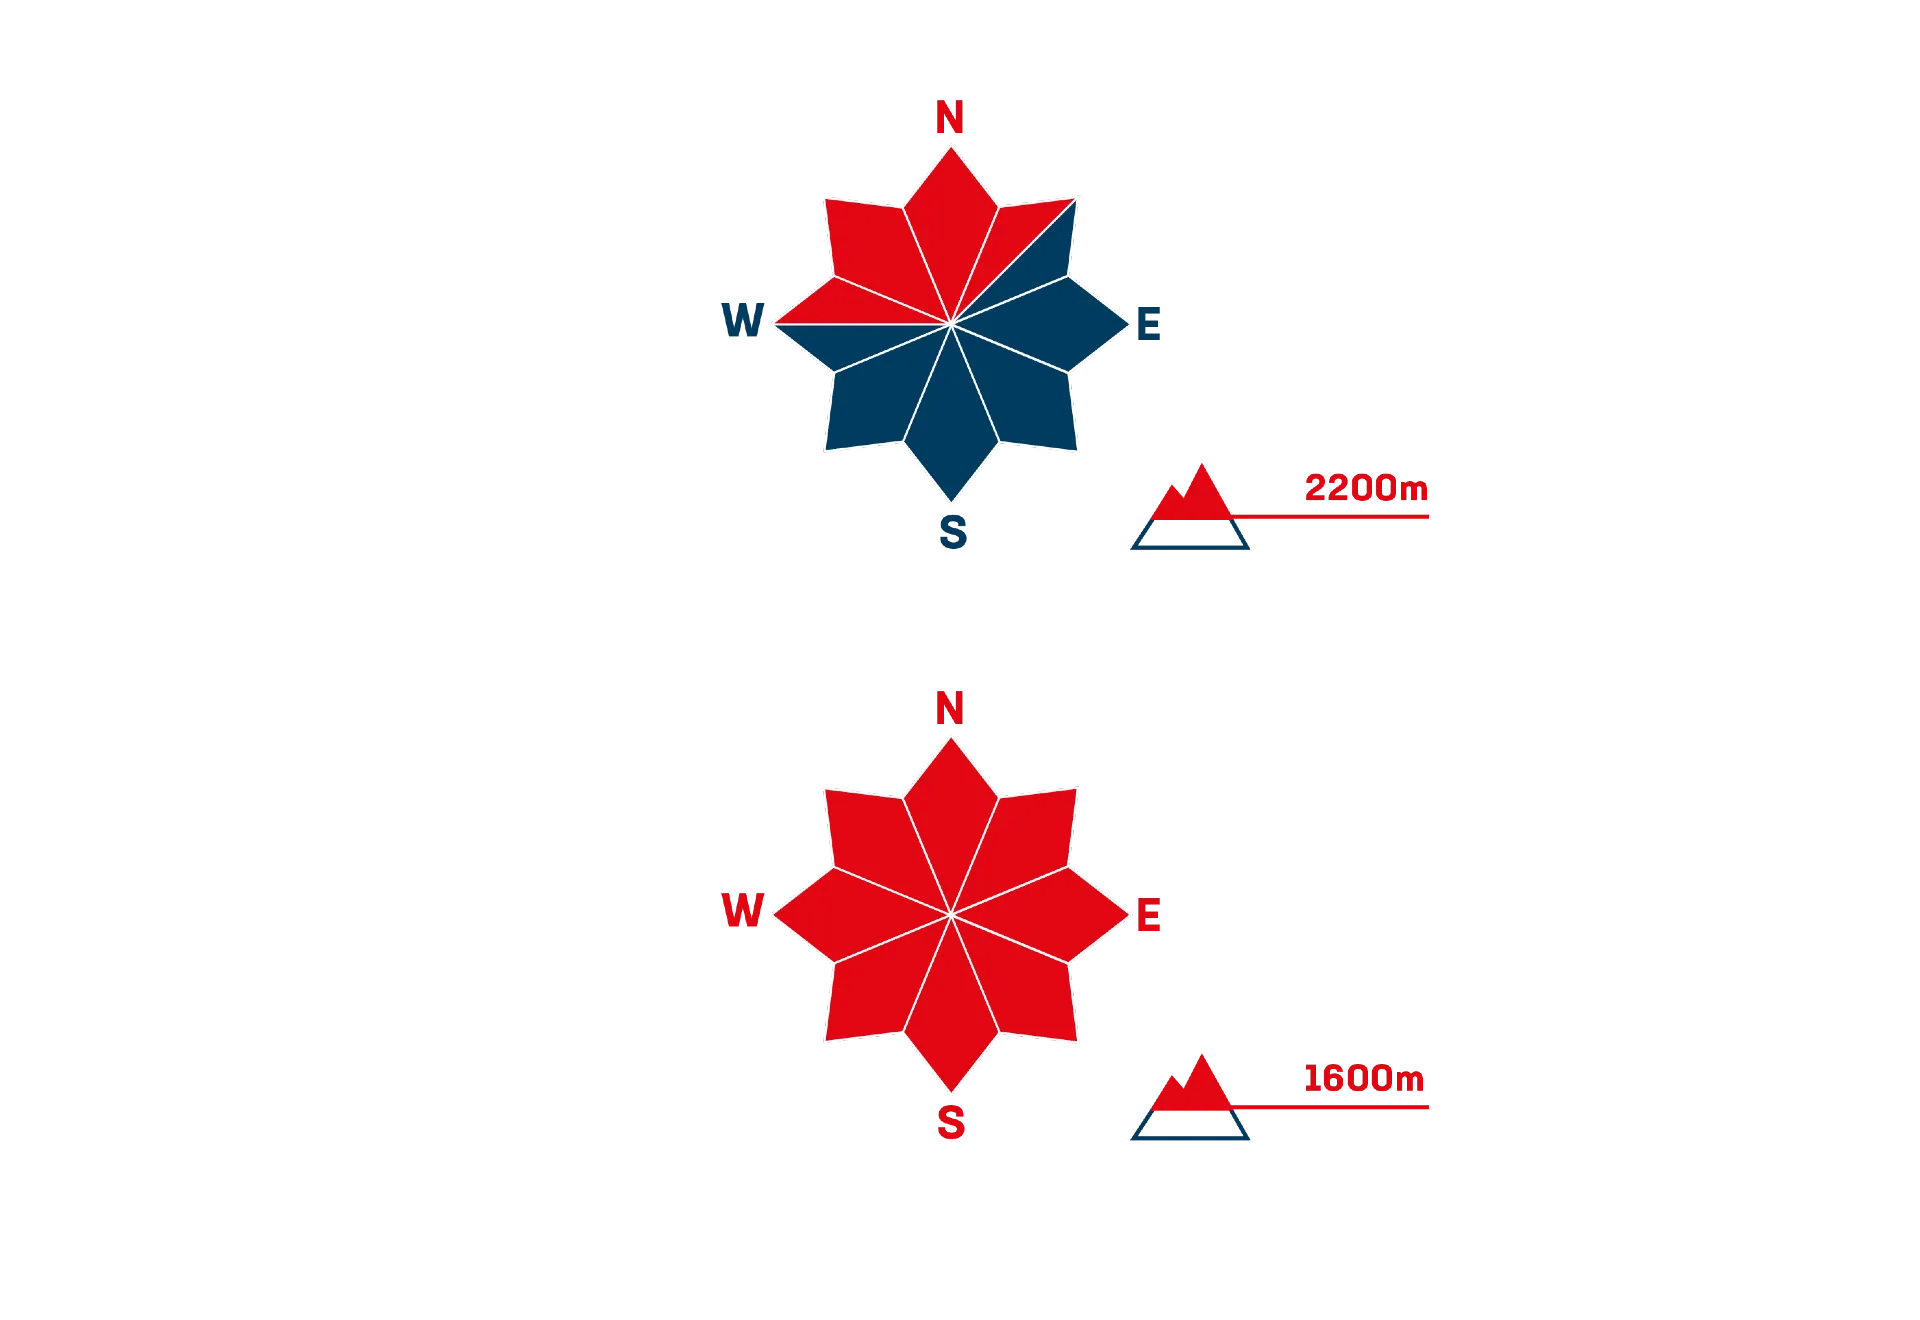
The location of danger spots is ascertained through slope aspect (orientation) and elevation information. This allows the orientation and topography of the planned tour as described in the guidebook to be checked again and, if necessary, an alternative tour selected. To recognize danger spots, any crux locations must de marked using the 30° inclination method and then decision-making locations determined along the route. This involves marking on the map all slopes that are steeper than 30° along or above the route and identifying them as potential avalanche terrain. If remote triggering or natural avalanches are not likely, then neighboring slopes above the planned route can be deemed suitable.
In addition to the ‘conditions’ and ‘terrain’ categories, that of ‘people’ is another important one when it comes to planning. Here, we refer to the size of the group and their level of ability (technical and physical), their motivation (family ski tour or freeride pow chase) and their equipment, which also have a bearing on perception of danger and tour selection. The whole group must also be fully aware of the level of risk and agree upon it, and demonstrate adequate risk management abilities.
Once the above steps have been followed and a tour route has been agreed upon, it is a good idea to plot the route, along with any crux or decision-making positions, onto a paper map or using an online planning tool like White Risk or Fatmap, so that you can refer to it during the tour.