• Free shipping from 50 € - Free return - Lifetime repair service

Planning a mountain bike tour

Planning a mountain bike tour

Having a plan is half the battle. And that applies biking too. This Basecamp article is designed as a guide for a more structured approach to planning your biking adventures. Our clearly laid out information and checklists will help you plan and realize your dream bike tour. And it will also help minimize any potential safety risks, too.

PLANNING STRATEGY FOR BIKE TOURS

Riding a mountain bike through alpine terrain is a dynamic process. The factors that influence your experience can change from one second to the next: the terrain switches from smooth flowing trails, to steep scree or root-strewn paths; the weather changes; your fellow bikers become tired; a section of trail is blocked/ closed – to name just a few.

Effective planning takes all of these eventualities into consideration. It’s the most important precondition for an enjoyable ride from start to finish. Reassessing the situation throughout the day is also important, so that you can adapt your plan or respond well to changes. Is everything going to plan? Could any potential (unexpected) difficulties arise? After all, you want things to go well. And for everyone to arrive at your destination, happy and in one piece. That’s why professional guides will always have a plan B, or even a plan C, in the back of their mind. These other options are almost a natural byproduct of effective planning.

The 3 x 3 planning model for biking

We don’t have to reinvent the wheel to come up with a coherent planning strategy. There’s a really handy model we can use that was developed for winter sports and is used by the German Alpine Club (DAV). Swiss mountain guide and avalanche expert, Werner Munter, developed what’s known as the 3 x 3 model. It’s based on a quadrant of 3 times 3 variables.

3 stages of preparation

  • Planning from home
  • Localized assessment, just before the start of the tour
  • Regular checks of conditions and group status during the tour

3 variable factors

  • People: those on the tour with you
  • Equipment: appropriate gear for the activity, variations between members’ gear, changes in status (e.g. through defects/ damage)
  • Conditions: weather, trails, nature protection, bike restrictions

So you examine each of the three factors “people, equipment, conditions” at each of the three stages of “planning, localized, during the ride”. This helps rule out lots of potential issues or nasty surprises. And if things still don’t quite go to plan, you’ll be better prepared to deal with it.

At first, the 3x3 model may seem a little abstract. But in practice, it’s a really useful tool for planning your mountain biking tours in a systematic, effective, and all-encompassing way.

Print out this 3x3 table or save it to your cell phone and use it as a checklist.

Planning – according to a plan

Planning – according to a plan

Download your route onto your cell phone, and off you go! That’s one way of approaching it. But if you want to be well prepared, there’s a bit more to it. You need a strategy. We’ve compiled the key elements of a well-planned mountain bike tour. For your best chances of success you’ll need to look at:

  • PEOPLE: Group dynamics, riding techniques and fitness
  • EQUIPMENT: Packing, breakdowns and first aid
  • CONDITIONS: Weather, planning & orientation, nature conservation


Group dynamics

An often-underestimated determinant of group bike rides is the people factor – whether it’s with your partner or a friend, or in a larger group. Each participant has their own expectations and requirements. And meeting all of these in some way is one of the most important aspects for a successful bike tour.

And the more people you have joining the ride, the more complex the planning will be. When it comes to longer tours like alpine traverses, people will often have invested a lot of time and energy into their preparations. But what they might neglect to do is talk about their personal goals and wishes. But it’s precisely this aspect that will have the greatest influence on a positive group experience. This is where silence is not the answer. And will almost inevitably lead to conflict within the group. The larger the group, the more potential there is for conflicts of interest. And for unexpected incidents like mechanical issues, accidents, loss of form, different expectations from the tour etc. But thankfully there’s a simple solution, and that’s communication, communication, communication – and coming to an agreement.

TIP

If you want to find out more about biking best practice, the following Basecamp pages feature a checklist for carrying out a thorough partner check and a detailed overview of the moutain code.

Checklist

• How long do I want to ride for?

• What’s the ability level within the group? Does it vary or is it pretty similar?

• What kind of trails do I want to ride?

• What kind of difficulties can I cope with?

• What does the average pace need to be?

• Do I need longer rest breaks? Have we scheduled in breaks like that?

• Am I prepared to drop back and help any struggling group members?

• Clarify the expectations of the group once again

• Discuss the schedule and route

• Discuss crux sections and possible weather-related changes to the plan

• Fitness: are all group members well? Is there someone in the group who is less fit than expected?

• Regularly check levels of motivation and mood within the group and react accordingly

• How about energy reserves?

• Is the trail difficulty appropriate for the group? What are the potential consequences?

• Are extra rest breaks needed?

Riding technique and fitness

Riding technique and fitness

What you need to be capable of

The success of a bike tour rests on having solid riding technique (and fitness). It’s an important decider when it comes to choice and planning of your bike tour. The better your technique, the less energy you use. You’re more relaxed and can recover better on the downhills. But a lack of technique on the other hand, can quickly lead to exhaustion and an increased likelihood of accidents. Plus, you’ll have less fun. So, in general, we would advise you to stick to shorter distances for more technically challenging routes.

In addition to riding technique, stamina and endurance play a key role when it comes to the length and duration of your chosen route. Ideally, group members will have similar levels of fitness. Or the better riders in the group should be prepared to adjust their pace to that of slower group members. And preferably be able to offer them help. Greater disparities within the group can also be managed through the use of e-mountain bikes for weaker members.

Practice, practice, practice... how to perfect riding technique

Practice makes perfect! And that applies to mountain biking too. The more distance you cover, the better you’ll become. But to really improve your biking skill, you need to push beyond your comfort zone – regularly and in a targeted way. A good way of approaching this is by signing up to a bike skills course, like those offered by our partners at Happy Trails, Rock My Trail, Bike Academy Erzgebirge and Trailglück.

Need a riding technique course?

But None of these near you?

Then check out our Partner Pages.

And the Internet has plenty of content for DIY training. Check out the YouTube channels of OnTrail and Rock My Trail with tons of easy-to-follow instructional videos and detailed technique explanations. Ideally, you’d have a buddy to practice with. Because it’s more fun with someone else, and you can give each other feedback and support.

The right terrain for training your riding technique

The right terrain for training your riding technique

Easy terrain – tough skills practice. Learning new physical skills is best done in a location that isn’t scary. You can try out new techniques in relative safety by practicing in a field or on more flowing sections of trail, before putting them to use in more challenging terrain. Playful sessions like these often develop a momentum of their own and are more fun and entertaining than you’d think.

Downhill riding technique: fun at the bike park

Just one day on lift-assisted downhill trails will really see your technique soar. It’s nigh on impossible to cover more vertical meters in a day than in the bike park. And it’ll give you more confidence for your next mission – and safety. But please be aware that although some riding techniques are tolerated in bike parks – such as drifting or other techniques that involve locked wheels – they are not appropriate on natural trails. It goes without saying that you should ride in an environmentally sensitive way.

Checklist

• Check your fitness and technique are a good match for your planned route

• Practice your riding technique, specifically for the level of difficulty or terrain you can expect on the route

• Train for fitness, bearing in mind the length of the route and height gain you can expect

• Consider booking onto a biking skills course

• Check that all group members have sufficient biking skills

• Check that all group members are fit enough for the route

• How can group members with varying performance levels best support each other?

• Check that the technical challenges and gradients are well matched to the skills and fitness levels of the group

• What are the possible consequences? Is a change of route called for?

• Should the group split up for some of the sections?

• How can the stronger group members support the weaker ones?

What to take on your bike tour

What to take on your bike tour

Whether it’s an alpine traverse from Innsbruck to Lake Garda, a multi-day ride in the Western Alps, or just a quick blast up your local mountain, what you take with you will have a big influence on the success or failure of your ride, or how enjoyable it is. And to mitigate any unforeseen situations and mechanical issues, you will need to take some tools and a repair kit with you.


What kind of backpack is best?

Even the pack you take on a Transalp mission shouldn’t weigh more than around 8 kg, if possible. Because every kilogram you carry will cost you in energy, and agility, on your bike. To fit everything you need, you’re looking at between 26 and 32 liters. Equipment like your pump or spare inner tubes can be stored on the bike itself, to save weight on your back.


If the weather is set fair, and it’s warm, you can easily leave one or other item of clothing at home. And of course there’s no need for your overnighting gear. A backpack with up to 12 liters’ capacity is plenty. Overall, the weight shouldn’t exceed 5 kg with all your hydration and food included.


If you don’t need to take much with you, you can also opt for a hip bag instead. Find out about the pros and cons of these as an alternative to a day pack here.

You’ll find full backpack advice here.

How do I pack my backpack

Keep it as light as possible, but with everything you need. Note: if the load is further away from your back and lower down, your back will be placed under more strain. So pack your backpack with the heaviest items in the middle of the pack and close to your back, so that the load is more evenly distributed. This will also give you better balance, and therefore safety, in the backcountry. You can use any compression straps to cinch down the volume of the pack and bring the load even closer to your body.

You’ll find more tips on how best to pack a backpack here.

 
What do I need to pack?

Experienced Transalp riders will tell you – take only what you need and leave the rest at home. Because especially over long distances, every gram counts. So carefully weigh up what you really need. But on shorter rides and day trips, you need to know which essentials are a must.

You’ll find a list of what to take and how to pack your backpack properly here.

Bike checks and bike repairs

Bike checks and bike repairs

When you’re in the backcountry, it can be a long way to the nearest bike shop or workshop. So you should make sure you have the most important tools with you and know how to use them. Some bike shops offer courses for bike repair novices. Just ask at your local bike shop if you’re interested.

Checklist

• Make sure you know how to do basic bike repairs like changing tires or changing brake pads

• Practice doing these repairs or attend a course

• Check you have the necessary tools, or obtain them

• Bike check: is the bike in good condition and safe to ride

• Check the brake pads

• Check pressure of suspension forks and/or rear shocks

• Bike check again: is the bike in good condition and safe to ride

• Do I have all the necessary tools and spares with me?

• For longer tours: are there any bike shops or workshops along the route?

• If there are any suspicious noises, check the bike

• Do not carry out any tightening work that’s required immediately at the start of planned rest breaks. It saves time.

Repair tips during the tour

Repair tips during the tour

When things go wrong during your bike tour, sometimes you need to improvise. We’ve compiled the most important hacks you can use to get yourself out of a sticky situation.

Biking first aid

Biking first aid

Wearing a helmet and gloves, plus knee and elbow protectors, offers good basic protection in case you suddenly find yourself straying from your line and going over the handlebars. Most of the time, it’s just a case of dusting yourself off and getting back on your bike. Or you might get away with a few scrapes and grazes. Phew. But it’s worth being prepared to deal with more serious situations like an emergency.

Which is why it’s good to keep your first aid knowledge up-to-date by attending courses or at the very least learning the basics online. And you should always pack a first aid kit, including survival blanket, as standard. If you don’t already own one, you’ll find a range of first aid kits here. And you should know the emergency number in your area off by heart. In Europe it’s 112, in the UK it’s 999, and in the USA and Canada it’s 911. There is also an emergency guide on the SOS label inside all deuter backpacks.

For a full overview and practical instructions on what to do in the event of a bike accident, check out our Biking First Aid Basecamp article.

Weather – a force to be reckoned with

Like any outdoor sport, with biking you must be prepared to cope with unpredictable weather. And it’s not to be underestimated. In the high mountains, rapid changes in weather can have serious consequences. But meteorology is a broad field and understanding how weather is generated and what it means is a complex issue. Firstly, we’ll look at a scenario of the weather conditions factor through the three stages of preparation:

Checklist

You check the weather forecast. The weather situation looks stable, with a slight chance of thunderstorms toward the evening. So you select a route that will get you back in the early afternoon.

You consult the weather forecast again. You check the sky. Are there signs that there might be a change in weather sooner than predicted? Conditions can vary greatly in the mountains and be very localized. Should the route be adapted because of these observations?

You keep an eye on the weather. It’s entirely possible that a thunderstorm will pass through sooner than predicted, and you might have to break off the tour or change routes. 

Planning your biking route and navigation

Planning your biking route and navigation

DIE RICHTIGE ROUTENPLANUNG

For many long-distance mountain bikers, it’s hard to imagine getting around without a GPS, digital map, or smartphone app these days. But traditional analogue maps still have their uses. If you want a quick overview of the wider area, printed maps at a scale of 1:25,000 are still the best option – as long as you know how to read a map! Publishers like Supertrail Map or Singletrail Map specialize in trails across the Alps.

The sky’s the limit when it comes to bike routes on the internet. Sites like Trailforks alone features over half a million bike trails across 135 countries. Other really good resources are Fatmap, KomootGPS-Tour and Outdooractive.

Most of these platforms offer simple route planning in just a few clicks, from the comfort of your home computer or even your cell phone. With Fatmap you can even get a 3D view of your chosen route.

HOW-TO-FATMAP

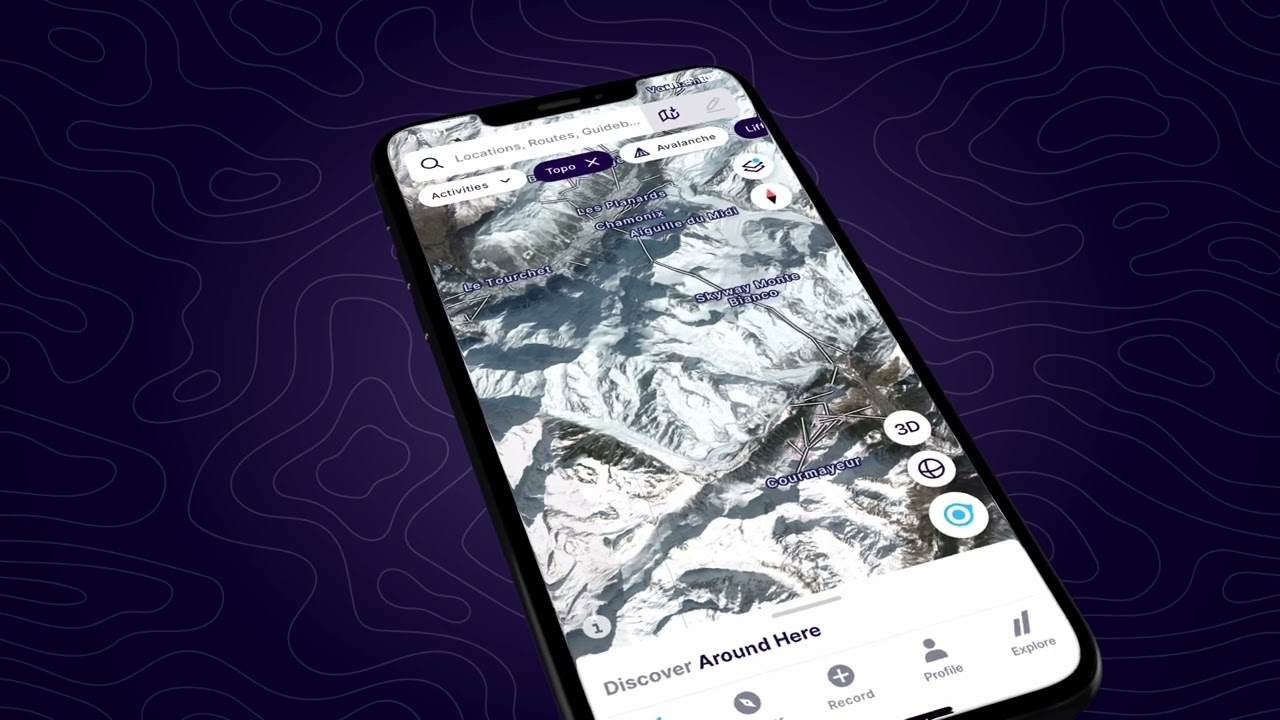
Pro Tip: use Fatmap to plan your route in 3D.

CHECKLIST

• Select a suitable route

• Decide on rest stops or mountain huts for breaks

• Establish alternative routes or retreat strategies in case of bad weather or unexpected incidents

• Check you have a map/ GPS device with you. Have you saved the route info to your cell phone? Batteries all charged?

• Are you struggling with navigation?

• Do you need to change routes (weather, level of difficulty etc.)?

• Any unexpected trail closures or restriction notices? What alternatives are there?

Digital navigation: beware!

Blindly relying on your GPS device or downloaded GPS data is not a good idea, even in our advanced digital age. When you’re in a gully, or at the base of a cliff face, satellite data can often be imprecise, or even incomplete. If there are lots of different trails in the area, you could easily find yourself going the wrong way. If you’ve downloaded GPS trails, then you should check the data first by combining or overlaying it with a digital map of the area. It can spare you from some nasty surprises.

Another potential pitfall with using digital navigation is your cell phone itself. If your cell battery is dead, your info will be pretty useless. So remember to take a power bank with you.

With all the fun and games, don’t forget nature

With all the fun and games, don’t forget nature

Once you’ve decided on the route and everyone’s ready to go, you could give everyone a little reminder. Nature is the best playground there is for outdoors people. So protecting it and caring for it is our shared responsibility. You should always behave in an environmentally responsible way on your bike rides and observe basic rules of conduct for a caring and harmonious coexistence.

For outdoor rules of “etiquette” and the Mountain Code.


Our bike experts

Our bike experts

  
VERENA STITZINGER

Verena is happiest living and working outdoors. Since 2009, the forestry graduate has been a mountain bike instructor with the German Alpine Club (DAV), a biking guide at www.alpindeluxe.de. She is also a state certified ski instructor.


ANDY RIEGER

Andy’s life revolves around biking. As a professional mountain bike guide and skills trainer, he founded the HappyTrails.de mountain bike guiding and skills school in 2008, and for almost 10 years he’s been a member of the national instructors team of the D.I.M.B. (Deutschen Initiative Mountainbike e.V.).